Lets create an employee search service using Oracle SOA.
We will create a service which will take an employee name as input return the employee details as output.
We will use the sample HR schema which is available in the Oracle XE database.
Prerequisites:
1) Unlock the sample HR schema present in the Oracle XE database.
2) Create Database and Application Server Connections in JDeveloper.
3) Create JDBC datasource in weblogic console.
1) Download SearchEmployee.xsd file and save it in a temporary location on your computer.
2) Create a SOA project with the name SearchEmployee

2) Drag and drop 'BPEL Process' on to the Composite.
Enter a name for the BPEL process and change the Template to 'Synchronous BPEL Process'.
Click on the browse icon of Input.
 -------------------------------------------------------------------------------------------------------
2.1) Click on Import Schema File.
Browse and select the SearchEmployee.xsd downloaded in step 1.
 -------------------------------------------------------------------------------------------------------
2.2)Select EmployeeSearchInput and click OK.
 -------------------------------------------------------------------------------------------------------
2.3) Similarly click on the browse icon of Output and select EmployeeSearchResult.
 -------------------------------------------------------------------------------------------------------
2.4) Click OK to Create BPEL Process.

3) We can see the newly created BPEL process in the Components(center) lane in the SOA Composite.
Right click to edit the BPEL process.

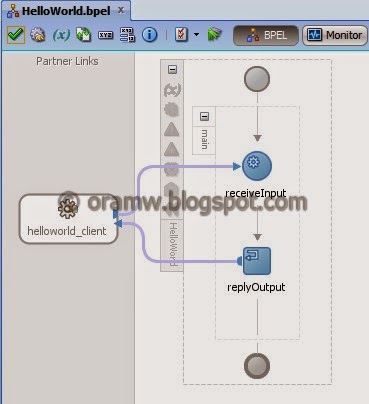
4) We can see the BPEL process in the editor.
Drag and drop the Database Adapter between the receive and reply.

------------------------------------------------------------------------------------------------
4.1) Enter the Database Adapter Service Name as search_employee_db
------------------------------------------------------------------------------------------------
4.2)Select the XE db connection and change the JNDI name to eis/DB/hr

------------------------------------------------------------------------------------------------
4.3)For Operation Type select Perform an Operation on a Table and choose only the Select operation.

------------------------------------------------------------------------------------------------
4.4)Import the EMPLOYEES table.

------------------------------------------------------------------------------------------------
4.5)No changes needed in the Relationships and Attribute Filtering
------------------------------------------------------------------------------------------------
4.6)In Selection Criteria add a parameter pEmpName and append the following to the sql query :
where first_name = #pEmpName and rownum <2

------------------------------------------------------------------------------------------------
4.7)Click next and finish the wizard.
Click OK to create the DB Adapter.

5) Drag and drop an Invoke activity after receiveInput.
Rename the Invoke to Invoke_search_employee_db.
Drag and connect the invoke activity to the Database Adapter(search_employee_db).
 ------------------------------------------------------------------------------------------------
5.1) Click on the plus icon for Input and Output and create search_InputVariable and search_OutputVariable respectively.

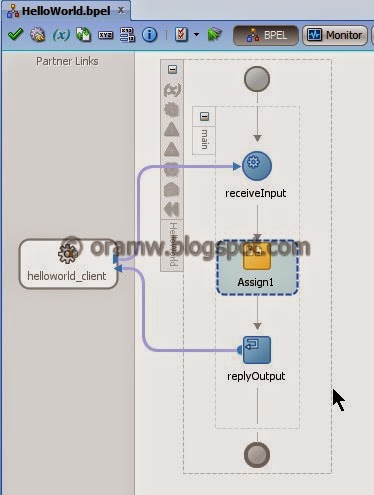
6) Drag and drop an Assign activity after receiveInput.
Rename the Assign to Assign_search_input.

7) Edit the Assign_search_input and connect EmployeeName under inputVariable on the left to pEmpName under search_InputVariable on the right.

8) Drag and drop an Assign activity before replyOutput.
Rename the Assign to get_search_output.

9) Edit the get_search_output and connect the attributes of Employees under search_OutputVariable on the left to attributes of EmployeeSearchResult under OutputVariable on the right.

10) Deploy the SOA composite :
Right-Click the Project and select : Deploy --> SearchEmployee
In Deployment Action select Deploy to Application Server and click Next.

11) Click Next in the Deploy Configuration

12) Select the application server connection to your SOA server and click next.

13) Select your SOA server and click finish.

14) You can see if the deployment is successful from the deployment log.

15) To test the composite go to the enterprise manager(weblogic/welcome1) and click the SearchEmployees SOA composite in the home page.

16) Click Test in the composite details page.

17) In the Test Web Service page enter a value for the input field in the request tab and click Test Web Service.

18) You will see the result in the Response tab.

Below is the video tutorial for creating the same Search Employee example in Oracle SOA.
We will create a service which will take an employee name as input return the employee details as output.
We will use the sample HR schema which is available in the Oracle XE database.
Prerequisites:
1) Unlock the sample HR schema present in the Oracle XE database.
2) Create Database and Application Server Connections in JDeveloper.
3) Create JDBC datasource in weblogic console.
1) Download SearchEmployee.xsd file and save it in a temporary location on your computer.
2) Create a SOA project with the name SearchEmployee
2) Drag and drop 'BPEL Process' on to the Composite.
Enter a name for the BPEL process and change the Template to 'Synchronous BPEL Process'.
Click on the browse icon of Input.
2.1) Click on Import Schema File.
Browse and select the SearchEmployee.xsd downloaded in step 1.
2.2)Select EmployeeSearchInput and click OK.
2.3) Similarly click on the browse icon of Output and select EmployeeSearchResult.
2.4) Click OK to Create BPEL Process.
3) We can see the newly created BPEL process in the Components(center) lane in the SOA Composite.
Right click to edit the BPEL process.
4) We can see the BPEL process in the editor.
Drag and drop the Database Adapter between the receive and reply.
------------------------------------------------------------------------------------------------
4.1) Enter the Database Adapter Service Name as search_employee_db
------------------------------------------------------------------------------------------------
4.2)Select the XE db connection and change the JNDI name to eis/DB/hr
------------------------------------------------------------------------------------------------
4.3)For Operation Type select Perform an Operation on a Table and choose only the Select operation.
------------------------------------------------------------------------------------------------
4.4)Import the EMPLOYEES table.
------------------------------------------------------------------------------------------------
4.5)No changes needed in the Relationships and Attribute Filtering
------------------------------------------------------------------------------------------------
4.6)In Selection Criteria add a parameter pEmpName and append the following to the sql query :
where first_name = #pEmpName and rownum <2
------------------------------------------------------------------------------------------------
4.7)Click next and finish the wizard.
Click OK to create the DB Adapter.
5) Drag and drop an Invoke activity after receiveInput.
Rename the Invoke to Invoke_search_employee_db.
Drag and connect the invoke activity to the Database Adapter(search_employee_db).
5.1) Click on the plus icon for Input and Output and create search_InputVariable and search_OutputVariable respectively.
6) Drag and drop an Assign activity after receiveInput.
Rename the Assign to Assign_search_input.
7) Edit the Assign_search_input and connect EmployeeName under inputVariable on the left to pEmpName under search_InputVariable on the right.
8) Drag and drop an Assign activity before replyOutput.
Rename the Assign to get_search_output.
9) Edit the get_search_output and connect the attributes of Employees under search_OutputVariable on the left to attributes of EmployeeSearchResult under OutputVariable on the right.
10) Deploy the SOA composite :
Right-Click the Project and select : Deploy --> SearchEmployee
In Deployment Action select Deploy to Application Server and click Next.
11) Click Next in the Deploy Configuration
12) Select the application server connection to your SOA server and click next.
13) Select your SOA server and click finish.
14) You can see if the deployment is successful from the deployment log.
15) To test the composite go to the enterprise manager(weblogic/welcome1) and click the SearchEmployees SOA composite in the home page.
16) Click Test in the composite details page.
17) In the Test Web Service page enter a value for the input field in the request tab and click Test Web Service.
18) You will see the result in the Response tab.
Below is the video tutorial for creating the same Search Employee example in Oracle SOA.